Showing posts with label Orchestrator. Show all posts

Thursday, March 14, 2019

System Center 2019 is now Generally Available!

Following on from last weeks post, Microsoft has just announced the General Availability release of System Center 2019.


This release is part of the long term servicing channel (LTSC) license model and comes with a support bandwidth of 10 years.

With full support for Windows Server 2019 across the stack, here's some of the additional capabilities that you get with System Center 2019:
  • VMM integration with Azure Update Management for simplified patching of virtual machines.
  • Better SCOM integration with Azure services such as Service Map to create automatic Distributed Application models based on server dependencies.
  • Azure Management Pack brings comprehensive alert and performance metrics from Azure resources into SCOM.
  • Along with a modernized and extensible SCOM full HTML web console, subscriptions and notifications are now modernized with support for HTML based email.
  • Maintenance schedules in SCOM with SQL server AlwaysOn are now supported.
  • SCOM Update and Recommendations feature for Linux workloads enables discovery of up-to-date MPs for Linux environments.
  • Linux monitoring is now resilient to SCOM management server failover.
  • All Windows Server Management Packs now support Windows Server 2019.
  • Dynamic Storage Optimization in VMM enables higher availability of workloads.
  • VMM now provides health and operational status of storage disks in Hyper Converged as well as disaggregated deployment.
  • New RBAC role in VMM ensures that IT admins can be provided access commensurate with their role and no more.
  • Support for latest versions of VMware in VMM (to enable migration to Hyper-V).
  • Faster backups with DPM with a 75% increase in speed and a monitoring experience for key backup parameters via Log Analytics.
  • DPM further supports backup of VMWare VMs including to tape.
  • Orchestrator supports PowerShellv4+.
  • Service Manager has an enhanced Active Directory connector.
  • Support for service logon across the System Center suite aligning with security best practice.
You can get your hands on this latest release from all of the normal download channels including Volume Licensing Center, my.visualstudio.com and also the Microsoft Evaluation Center.


Enjoy!

Tuesday, August 19, 2014

Useful Recent CloudOS News and Blogs

Well, after a few weeks away from work on vacation, I've finally managed to filter through the majority of my unread emails and Twitter feeds. What I've come across from browsing through just a few short weeks of them is a number of very useful and cool updates and community offerings for System Center 2012 R2, Windows Azure Pack, Azure and Windows Server 2012 R2.

I've broken my favourites down into categories to make things easier to reference and if you haven't seen some of these posts yet and are working with CloudOS products, then I'd strongly advise you to check them out:

SCOM

Jalasoft – Xian SNMP Device Simulator V5


SCOM 2012 – Display & Download MPs Using PowerShell Widgets


VMM

Download the VMM Network Builder

Blog Series: Bare Metal Post-Deployment


So that's it in a nutshell for now - and although it's not a comprehensive list of everything that's been happening over the past month or so, there's still a lot of very impressive community content around CloudOS.

Enjoy!

Thursday, June 19, 2014

TechCamp 2014 Dublin

Day 1 for our TechCamp 2014 event has just finished and each session had a great turnout of attendees. Microsoft Ireland's Art Coughlan kicked off with a keynote speech on how Microsoft can help people with their journey to the cloud and he gave some great real-world examples of well known global brands using Cloud Technologies such as Azure, Hyper-V and System Center.

After the keynote this morning, Aidan Finn gave a really interesting session on Windows Server Storage Spaces and Scale Out File Servers. He walked through building the solutions in his demo step-by-step to give people an idea of how easy it is to get started.

After Aidan's presentation, it was my turn to get down and dirty and shake with datacentre automation in my 'Service Automation Using System Center' session. I first spoke about getting your automation processes properly mapped out and including the right teams to plan the process. Then I went into a demonstration that incorporated System Center Orchestrator, Service Manager and Windows Azure Pack. Thankfully my themed Windows Azure Pack Tenant Portal went down well and I received some nice attendee comments during lunch about it:


The 'New Hire Onboard' process that I automated was made possible using System Center Orchestrator and Service Manager integrated into Windows Azure Pack. The secret sauce to surface the request management in the WAP Tenant portal was delivered using the awesome new GridPro Request Management - check it out here: http://www.gridprosoftware.com/en/products/requestmanagement)


After lunch, Damian Flynn took to the stage and gave a full overview to the audience on how all the System Center components integrate with each other and then he went into the Windows Azure Pack Framework and all it's moving parts - a very enjoyable session for the attendees with the 'F Bombs' dropped kept to a minimum ;)

The final presentation of the day saw Aidan get back up for more heckling as he spoke about this time on Hybrid Cloud using Microsoft Azure. Some really interesting demo's delivered to the audience configuring public-cloud VM's and virtual networking on the fly.

That wraps up Day 1, tomorrow's track of 'Software as a Service' should be a blast!

Thursday, February 27, 2014

New Windows Azure Pack (WAP) & Azure Visio Stencils Available for Download

Well, it's been a few months since I last had a chance to work on some new Visio stencils and finally, I've managed to put one together for the relatively new Windows Azure Pack (aka WAP) and have bundled into the same stencil, some graphics for Windows Azure too.

If you're looking for some other Visio stencils related to System Center 2012 R2,  then you can find them here:

SCVMM 2012 R2 Visio Stencils

DPM 2012 R2 Visio Stencils

SCOM 2012 R2 Infrastructure Visio Stencils

SCOM 2012 R2 Application Visio Stencils

SCOM 2012 R2 Networking Visio Stencils

SCOM 2012 R2 APM Visio Stencils

This stencil contains images that cover things like the WAP Admin & Tenant portals, SPF Web Server, SMA, Service Bus and Workflow Manager.


I've also thrown in things like Visual Studio Online with its Global Service Monitor and APM capabilities, Orchestrator, VMM, AppController and standard Windows Azure roles and functions.

You can download the stencil from the TechNet Gallery at the following link:

http://gallery.technet.microsoft.com/Windows-Azure-Pack-Windows-813d13a8


If you find this stencil useful, please take the time to give it a Star rating on the TechNet Gallery :)

Let me know if you have any suggestions or problems with the stencil by posting in the comments section below.

Monday, January 7, 2013

System Center 2012 Orchestrator (SCORCH 2012) - Installing Service Pack 1 RTM

At long last the final Release To Manufacturing (RTM) version bits of Service Pack 1 (SP1) for System Center 2012 are generally available (GA). 

This Service Pack has been highly anticipated as it not only delivers the customary bug fixes that are to be expected with any such release , but it also brings a large number of new exciting feature additions and enhancements.

This post is one of a number of posts that I've been working on to help people get upgraded to System Center 2012 Service Pack 1. You can check out my other posts here:


The following list contains some of the enhancements that SP1 brings to System Center 2012 Orchestrator (SCORCH/SCO 2012)
  • Support for Windows Server 2012
  • Support for SQL Server 2012
  • New Exchange Administrator Integration Pack for Orchestrator in System Center 2012 SP1
  • New Exchange Users Integration Pack for Orchestrator in System Center 2012 SP1
  • New Representational State Transfer (REST) Integration Pack Guide for Orchestrator in System Center 2012 SP1
  • Updated Active Directory Integration Pack for System Center 2012 - Orchestrator
  • Updated HP Service Manager Integration Pack for System Center 2012 - Orchestrator
  • Updated System Center Integration Pack for System Center 2012 Operations Manager
  • Updated System Center Integration Pack for System Center 2012 Virtual Machine Manager
  • Updated VMware vSphere Integration Pack for System Center 2012 - Orchestrator
Be aware that System Center 2012 Service Pack 1 contains updates for the whole suite of products (not just Orchestrator) and it's advised that you follow a particular upgrade sequence of each product as per this warning:

If you are planning to upgrade two or more System Center components, it is imperative that you first consult the guide 'Upgrade Sequencing for System Center 2012 SP1'. The order in which you perform component upgrades is important. Failure to follow the correct upgrade sequence might result in component failure for which no recovery options exist

If you are happy enough with your product upgrade sequence and are now ready to start the Orchestrator 2012 RTM upgrade to Service Pack 1, then this blog post will detail the pre and post SP1 upgrade tasks that you need to consider along with the deployment of SP1 to your Orchestrator server infrastructure.
Some of the information contained in this post will be taken directly from the accompanying 'Orch12_UpgradeSP1' guide from Microsoft.

Orchestrator 2012 SP1 Pre-Upgrade Tasks

1. Complete all runbooks running in your current Orchestrator installation and ensure they are in a stopped state. For information about stopping runbooks, see the Running Runbooks topic in the Orchestrator library on TechNet.

2. Close any open programs and ensure that there are no pending restarts on the computer. If possible and as a precaution, just restart the Orchestrator server(s) to alleviate this issue.

3. Perform a full backup of the Orchestrator database. For information about backing up the Orchestrator database, see the How to Back up Orchestrator topic in the Orchestrator library on TechNet. You can also use tools provided by SQL Server to back up the Orchestrator database. For more information, see Backing Up and Restoring Databases in SQL Server.

4. Upgrade your hardware, operating system, and other software if necessary to meet the requirements of Orchestrator in System Center 2012 SP1. You can review the SP1 requirements for Orchestrator here.

Before we continue with the upgrade, it's worth mentioning a note in the upgrade guide about System Center 2012 components and their associated integration packs:

Note
To allow you the leeway to upgrade other System Center components as needed, after you have upgraded the Orchestrator servers to System Center 2012 SP1, you can run:
  • A System Center 2012 integration pack against a System Center 2012 component.
  • A System Center 2012 SP1 integration pack against a System Center 2012 SP1 component.
  • No other configurations are supported.

High-Level Overview

Here's a high-level overview of what's involved to get your Orchestrator 2012 environment upgraded to SP1:
  1. If using SCOM 2012 to monitor your Orchestrator environment, put all of the Orchestrator servers in to maintenance mode.
  2. Uninstall any other System Center 2012 product stand-alone consoles (e.g. SCOM or SCVMM consoles)
  3. Uninstall the Orchestrator management server, any runbook servers, the Web Service, and the Runbook Designer.
  4. Install the Orchestrator management server in System Center 2012 SP1, as described in the Deployment Guide
  5. Install any Orchestrator runbook servers in System Center 2012 SP1.
  6. Install the Orchestrator Runbook Designer in System Center 2012 SP1.
  7. If needed, install the Orchestrator Web Service in System Center 2012 SP1.
  8. Take the Orchestrator servers out of maintenance mode.
  9. Update System Center 2012 Orchestrator Integration packs to SP1
  10. Return to the Upgrade Sequencing Guide.
Place Servers into Maintenance Mode in SCOM

If you are monitoring your Orchestrator 2012 servers with SCOM 2012, then it's a good idea to place these servers into Maintenance Mode in SCOM before you start upgrading them to SP1. Doing this will stop any alert storms notifying you that Orchestrator isn't functional and will ensure that your SLA's are maintained.

To place your Orchestrator 2012 servers into Maintenance Mode follow these steps:

Open the SCOM 2012 Operations console, click on the Monitoring tab from the wunderbar and then expand the System Center Orchestrator folder and click on the Management Servers state view as shown below


Now you can right-mouse click on your Orchestrator 2012 servers and choose the Maintenance Mode\Start Maintenance Mode options from the flash out menu to be presented with the Maintenance Mode Settings dialog box. As below, select the Planned radio box, choose a category and specify a duration value for how long you will have the server in Maintenance Mode, then click OK


You should then have an icon with a picture of a wrench located beside your Orchestrator 2012 server(s) as well as a status of Not Monitored indicating that you have placed it into Maintenance Mode.

Uninstall Other System Center 2012 Product Consoles

If you have integrated Orchestrator with any of the other System Center 2012 products, then you will have the relevant stand-alone console for the integrated product installed on your Orchestrator server(s). These consoles will first need to be uninstalled before you upgrade to SP1. As a matter of fact, if you follow the Upgrade Sequencing for System Center 2012 SP1 guide, you will see that some of these consoles will need to be uninstalled anyway as part of the products own SP1 upgrade.

To uninstall the stand-alone consoles, logon to the Orchestrator server, click Start, type appwiz.cpl as below


This will open up the Programs and Features window and from here, you can right-mouse click on the stand-alone console that you want to remove and simply click on the Uninstall/Change button similar to what I've done in the example below for the SCOM 2012 console


Now just follow the onscreen wizard for the relevant System Center application to remove the stand-alone console (SCOM/SCVMM/DPM etc.)

Uninstall the Orchestrator Server Components

The next step in the upgrade process is to uninstall the Orchestrator management server, any runbook servers, the Runbook Designer and the Web service. These components will be reinstalled later as part of the SP1 upgrade.

Similar to the uninstall process above, with an account with administrative permissions, logon to the Orchestrator server, click Start, type appwiz.cpl and then hit Enter to open up the Programs and Features window.

From here, you can right-mouse click on the Orchestrator Server component that you want to remove and simply click on the Uninstall/Change button as below.


Repeat this step until you have removed all of the Orchestrator server components (management server, any runbook servers, the Runbook Designer and the Web service) from your Orchestrator server(s).

Once you have uninstalled all of the Orhcestrator server components, I'd recommend a restart of the  server(s) just to ensure that there are no open files or stale registry keys before we proceed with our upgrade to SP1.

Install the SP1 Orchestrator Server Components

To install the SP1 Orchestrator server components, logon with an account that has administrative permissions and then browse to the location on your server that you have mounted or extracted the System Center 2012 Orchestrator Service Pack 1 media to.

Now locate the SetupOrchestrator executable, right-mouse click on it and choose the Run as Administrator option as below


From the System Center 2012 Orchestrator Setup splash screen, click on the Install option below the Orchestrator heading to continue
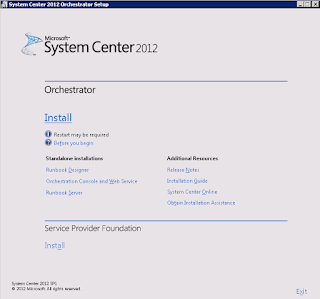

At the Product Registration screen, enter your company info and product key, then click Next to continue


Read the license terms from the next page, accept them, then click Next to continue


From the Select Features to Install window, choose the relevant Orchestrator server components that you wish to install and then click Next (in my example below, all of the components are on the same server so I can just leave them all selected.)


At the Configure the Service Account window, enter the service account credentials that you would have used when you initially installed Orchestrator 2012, click the Test button to confirm they are entered correctly and then press Next to move on


From the Configure the Database Server window, enter the SQL server and instance along with the relevant authentication and port information and then click Test Database Connection. If the database connection test succeeds, click Next to continue.


Now from the Configure the Database screen, select the Existing Database option and choose the original database that you had deployed Orchestrator 2012 RTM to. Click Next to move on.


Choose the Orchestrator users group and select the option to grant remote access to the Runbook Designer -or just leave the default settings as they are here, then click Next


Choose your ports for the Web services or just leave them at their default settings, then click Next


From the next screen, select the installation location or again leave at the default setting, then click Next


Configure the Customer Experience Improvement Program (CEIP) settings in the next screen and then click Next


Finally, at the Installation Summary screen, verify all of your configuration settings, then click the Install button to begin the upgrade to SP1


All going well, you should see the screen below confirming that you have completed Setup successfully


Now, when you open up the Orchestrator Runbook Designer, you can see that all of your previous runbooks are still present along with their associated integration packs too


To verify that you have indeed now upgraded your Orchestrator deployment to System Center 2012 Service Pack 1, click on the Help menu and then choose the About option and you will see that SP1 has been applied as shown below


Take Servers out of Maintenance Mode in SCOM

Once the upgrade process is complete, if you haven't placed a time limit on your Maintenance Mode configuration of the SCOM agents on your Orchestrator servers, ensure that you take them out of Maintenance Mode now. Follow the process further up in this post to turn off Maintenance Mode.

Update System Center 2012 Integration Packs to SP1


Once you have upgraded your Orchestrator environment to Service Pack 1, you will need to then upgrade any of your relevant integration packs to their available SP1 versions.  A couple of points to be aware of here though:

Note 1
Be aware that if you install an integration pack that is specifically for SP1, then any earlier version integration packs will need to be first uninstalled from all runbook servers and designers before you can deploy the new SP1 ones. You can then register and deploy the upgrade of the integration pack. If you do not uninstall the previous version of the integration pack prior to registering and deploying the upgrade version, the upgrade version will fail.

Note 2
To allow you the leeway to upgrade other System Center components as needed, after you have upgraded the Orchestrator servers to System Center 2012 SP1, you can run: 
  • A System Center 2012 integration pack against a System Center 2012 component.
  • A System Center 2012 SP1 integration pack against a System Center 2012 SP1 component.
  • No other configurations are supported.

On the 3rd January 2013, Microsoft released the 'System Center 2012 Service Pack 1 - Orchestrator Component Add-ons and Extensions'. It is highly recommended that once you have upgraded your other System Center 2012 products, that you then download these add-ons and extensions and deploy any integration packs that are relevant into your environment to ensure you get the most out of your Service Pack 1 experience.

Conclusion

That should be all you need to do now to upgrade Orchestrator 2012 to Service Pack 1. Ensure that you refer back to the 'Upgrade Sequencing for System Center 2012 SP1'. guide to ensure that you upgrade any other System Center 2012 products in the correct order.

Sunday, October 16, 2011

Installing System Center Orchestrator 2012

In this blog post I'll walk through the steps involved to get the new Microsoft System Center Orchestrator 2012 BETA installed. System Center Orchestrator 2012 (also known as SCO or SCORCH) is the new name for the market leader 'Automation and Runbook' application Opalis that Microsoft aquired in late 2009.

Taken from the Microsoft System Center Blog:

System Center Orchestrator 2012 delivers 3 core benefits to customers:

  • Integration – Optimize and Extend your existing Investments
  • Orchestration – Deliver Flexible and Reliable Services
  • Automation – Lower Costs and Improve Predictability

The steps in this post are based on the BETA edition, although the installation steps will be the same for the final RTM version.

To start with, ensure you have a virtual or physical machine that meets the following pre-requisites:

Resources:

  • 1 gigabyte (GB) of RAM or above (2 GB recommended)
  • 200 megabyte (MB) of available hard disk space
  • Dual-core CPU or better
 
Software:

  • Microsoft Windows Server 2008 R2
  • Web Server Role (IIS) installed
  • .Net Framework 4
  • Sliverlight 4 (for the Orchestration Console)
  • Microsoft SQL Server 2008 R2

You can download the BETA from the link below:

http://www.microsoft.com/download/en/details.aspx?id=26503

Once you have downloaded the BETA to a location on the C drive of your new Windows Server 2008 R2 machine, right mouse click on the 'SystemCenterOrchestrator2012Beta.exe' installer and select 'Run As Administrator' to begin the process.


Choose a directory to extract the files to and select 'OK'


Now Right Mouse Click on the 'SetupSCO.exe' installer and select 'Run As Administrator' to begin the installation wizard


You should now see the 'System Center Orchestrator 2012 Setup' window and you will be presented with a number of installation options. SCORCH supports either a fully co-located installation of all the roles onto the same server or it also supports standalone installation of each component onto different servers if you so wish.


We're going to go for the co-located installation and install all of the components onto the one virtual machine, so click on the 'Install Orchestrator' option to continue


 The installer will now check to see if your machine has met the pre-requisites and will prompt you if something needs to be installed beforehand  - see the screen below


Once the pre-requisites have been met, the 'System Center Orchestrator 2012 Setup' wizard will continue. Accept the licence agreement from the screen below and click on 'Next'


From the 'Select Features to Install' screen, ensure that the feature(s) you want are selected and then click 'Next' to move on


Based on the features that you have selected to install, the Pre-Requisite checker will again run and check the requirements for these features against the computer you are installing onto. In the screen below,I haven't installed the .Net Framework 4.0 so this has been highlighted. It does provide a nice little link for me though to go and download the .Net Framework 4.0 which is a handy tip!


Once you have downloaded and installed the pre-requisites, click on the 'Verify Prerequisites Again' button and the installer should move on to the next step

In the next step, you need to create a user account within your Active Directory that will be used to run Runbooks and access remote system resources. This account must have at least local administrative privileges on the computer you are installing SCORCH onto along with 'Log on as a service' rights enabled too.


Once you have created the new account with the relevant administrative and logon as a service peissions on the SCORCH computer, click on the 'Test' button and the installer should confirm if all is in place to continue on. When you see the 'Credentials Accepted' message, then click 'Next'


At this point we are now ready to create the new Orchestrator SQL database and there are a couple of ways to do this. I am installing SCORCH into its own SQL instance on a remote SQL server and have already configured this before I have begun the SCORCH installation process.

Important Note: As was the case with SCOM, System Center Orchestrator 2012 needs an SQL collation setting of  - SQL_Latin1_General_CP1_CI_AS. If this collation setting is not configured, you WILL run into problems down the line with an issue relating to 'Send Email Activity not storing data'

The screenshot below shows the SQL collation setting being configured at the time of the SQL Instance installation


As I've installed a separate SQL instance for my SCORCH installation, I've made my SCORCH service account (srv_scorch) a member of the 'Sys Admin' role for this particular instance in SQL. The SCORCH service account needs to have at least 'db_owner' permissions on either the SQL instance or a pre-created empty SQL database named 'Orchestrator' before you continue with the SCORCH installer.

From the screen below, type in the SQL server name and instance (if applicable) and select either a new or existing database depending on your preferences, then click 'Next'


From the next screen, configure the Orchestrator management group and whether or not you want to grant remote access for the Runbook Designer (this option will have to be selected from a computer other than the Management Server however). Click 'Next' to continue


Leave the ports at their default values or change them to whatever you need to and then click 'Next' to continue on


Choose either the default installation path for SCORCH or browse to a different location and then click 'Next'


Confirm you are happy with the installation summary or if you need to change anything simply click on the handy 'Change' link option beside each section to go back directly to make your changes. Click 'Next' once you're happy to continue


Finally, once the installation is finished, you should see the screen below stating that 'Setup completed successfully'.


Click on 'Close' from the screen above and the new 'System Center Orchestrator Runbook Designer' window will now open confirming that you have installed SCORCH correctly!


 You can also now open the 'System Center Orchestrator Deployment Manager' from the 'Start Menu' as below


The screen below shows the new System Center Orchestrator Web Console - accessible from the port number that you specified during installation


So that completes the installation of SCORCH and for anyone who has had the hardship of installing Opalis 6.3 with the console, then you'll find this a much more pleasant and easier process than that one!

Now to see how hard I can push the integration of SCORCH with the other System Center products!


Sunday, June 5, 2011

The 'Unoffical' System Center Management Pack Catalog

I came across this blog posting yesterday when trying to catch up on all of my rss feeds and thought it was worth posting as sometimes trying to find a SCOM Management Pack or Opalis (Orchestrator) Integration Pack can be difficult.
The author of the blog has compiled a list of hardware and software vendors that supply SCOM and Opalis (Orchestrator) MP's and IP's and it could be a useful tool when trying to locate that hard-to-find Management Pack.

Update Jan 2013: I'm updating the link below to reflect some updates by the author and a new link

Here is the link to the 'Unofficial' System Center Management Pack Catalog:

SCOM
http://unofficialsystemcentercatalog.wordpress.com/2012/12/27/operations-manager-is-there-a-management-pack-for/

Opalis (Orchestrator)
http://unofficialsystemcentercatalog.wordpress.com/2011/04/22/opaliscatalog/

Microsoft have just revamped their Pinpoint website to make it much easier to find the Management Pack that you need - the previous implementation looked good but was much harder to find the MP you were looking for and a lot of the 3rd party MP links were outdated too with older Management Packs of no use.

The link to the new Microsoft Pinpoint website is below:

http://systemcenter.pinpoint.microsoft.com/en-US/Default.aspx

Monday, March 21, 2011

Microsoft System Center Orchestrator

It's official - Microsoft have announced (what most of us knew already!) at MMS 2011 that Opalis will be renamed 'Microsoft System Center Orchestrator'.

I'll post more on this as I go through some of the sessions.

Thursday, January 27, 2011

Opalis 6.3 Operator Console Installation Made Easy!

For anyone that has had the pleasure (and heartache!) of installing Opalis 6.3 from scratch, then you will know it is a long and arduous process that involves first installing the Opalis 6.2 Management Server, Database, importing the Licence, installing the Operator Console, upgrading to Opalis 6.2 SP1 and then upgrading to Opalis 6.3

The hard part was when you wanted to install the Opalis Operator Console and this involved the following:

  • download a number of pre-requisite Java and JBoss installers (approx 200MB worth of them!)
  • copy these files to a directory on the C:\ drive
  • ensuring that you had set the 'Path' Environment variable set to %JAVA_HOME%\bin
  • run the java executables from a command line
  • open powershell and run the Opalis console operator installer script (installopconsole.ps1)
  • starting JBoss by running 'run.bat-b 0.0.0.0 from the <JBOSS>\bin folder
If all of these steps were followed exactly to the letter, then the Powershell script would run through a number of installation steps, prompting for user intervention to eventually finish the installation of the Operator Console!!

See below link for a more detailed step by step installation:

http://systemcenterblog.blogspot.com/2010/11/installing-opalis-part-i-opalis-622.html

Once this was completed, you then needed to updgrade Opalis 6.2 to Opalis 6.2.2 SP1

http://systemcenterblog.blogspot.com/2010/11/installing-opalis-part-2-upgrading-to.html

Finally, you then needed to copy an MSI file containing the Opalis 6.3 binaries to the install location and run an upgrade patch to complete the Opalis 6.3 upgrade.

http://systemcenterblog.blogspot.com/2010/11/installing-opalis-part-3-upgrading-to.html

Talk about going around the block for an installation!!!

In fairness, we really enjoyed doing this installation as it brought back memories of long winded legacy application installations from a few years back and lets you really get into the nuts and bolts of the Opalis install structure.

So, how is that 'Made Easy' (see blog post title above!) you might ask?

Well, I came across an entry last night on the System Center Technet site from Adam Hall - Snr Technical Product Manager for Opalis - about a new 3rd party tool that pretty much automates all of the hard part of the installation of the Operator Console that I have outlined in my steps above.

The product is from a company called 'Kelverion' and I downloaded it last night and ran it against a new test VM with no previous Opalis installation to see how it compared to our first attempt at Opalis 6.3 installation (which took us nearly 2 hours by the time we figured out all the steps and read the documentation last month!).

The results are amazing and I managed to get the whole Opalis 6.3 installation including the Operator Console installed in just under 30 minutes! The reason it is so quick is that Kelverion's Configuration Utility for OpConsole is nearly 200MB in size and contains all of the Pre-Requisite software such as Java and JBoss inside the MSI file. It runs through a nice handy wizard prompting you for all of the required information including creating and naming the new directories to place and run the Pre-Requisite software from. The best thing about this is that it is free too!

You can read more about this utility here:

http://www.kelverion.com/news/2011/1/26/kelverion-configuration-utility-for-opconsole-released.html

You need to register for your free download from here (you will get an email within a minute with the download link):

http://www.kelverion.com/utility-for-opconsole-download/

You can view a really quick 5 minute video of the utility in action here:

http://www.kelverion.com/utility-for-opconsole-demo

I most definitely recommend that you use this utility for any future Opalis Operator Console installations that you are deploying -although the orginal long way is worth doing for the fun at least once!.

Thursday, January 6, 2011

Opalis Virtualization Support

The Microsoft Technet Opalis Blog has just announced today that Opalis 6.2.2 and later are now officially supported in a virtualized environment.

See the news here:

http://blogs.technet.com/b/opalis/archive/2011/01/06/opalis-integration-server-is-officially-supported-by-microsoft-in-virtualized-environments.aspx