In Part 1, I detailed the pre-upgrade tasks that need to be carried out to prepare your SCOM/OpsMgr 2012 environment for upgrading to Service Pack 1 (SP1). In Part 2, I covered a walkthrough of the upgrade deployment process of your management servers, ACS collectors, Gateway servers and stand-alone consoles. This post will finalise the upgrade process of your agents, Web console (stand-alone) and Reporting server (stand-alone) roles.
Upgrading Push-Installed Agents
When you have upgraded your management servers, you can then deploy the SP1 update out to your existing SCOM 2012 RTM agents either via push install or manual install.
Some important notes taken again from the 'OM12SP1_Upgrade' guide before we continue with our agent upgrades though:
Note 1
When you upgrade an agent, the Operations Manager installer service runs and is not removed until after the completion of the upgrade. If the agent upgrade fails, you might have to re-install the agent because the installer service was not properly removed. If you attempt to upgrade the agent again and it fails, you should re-install the agent after you have completed upgrading all features of Operations Manager.
Note 2
If the agent is installed on a computer that has System Center 2012 Operations Manager (RTM)Operations console or web console installed, you must first uninstall the consoles before you upgrade the agents. You can do this by uninstalling System Center 2012 Operations Manager in Programs and Features. You can reinstall these consoles after upgrade is completed.
Note 3
If UAC is enabled, you must run the agent upgrade from an elevated command prompt.
Note 4
Information about upgraded agents might not appear in the Operations console for up to 60 minutes after performing the upgrade
Now that we have the formalities out of the way, we can continue on and get the agents upgraded. Firstly, we'll start with the existing SCOM 2012 agents that can be upgraded by using a push install.
To upgrade these agents using the SCOM 2012 Console, simply browse to the Administration tab in the wunderbar, expand the Administration view, expand Device Management and then click on the Pending Management view to see all of the agents awaiting upgrade. Highlight the ones you want to upgrade, then right-mouse click and choose the Approve option as below.
Note: As a general rule of thumb, Microsoft say not to do any more than 200 agents at a time but personally, I'd do no more than 100 agents at a time to have more control and to ease bandwidth.

This will prompt you for some administrator credentials to allow the agent upgrade and once you enter these, you can click the Update button to begin the deployment

When the upgrade has completed, click Close to finish.
Upgrading Manually Installed Agents
Manually-installed agents are agents that were installed manually, either by using the Command Prompt window, or by using the MOMAgent.msi Setup Wizard. Use the following procedure to upgrade these agents.
- Log on to the computer that hosts the agent with an Operations Manager Administrators role account for your SCOM 2012 management group.
- Run Setup.exe from the Operations Manager installation media.
- On the first page of the Setup Wizard, click Local agent. When the Welcome to the System Center Operations Manager 2012 Agent Upgrade Wizard page opens, click Next.
- In the System Center Operations Manager 2012 Agent Setup dialog box, click Upgrade.
- When the Completing the System Center Operations Manager 2012 Agent Setup Wizard page appears, click Finish.
From the SCOM 2012 Operations console, click on the Administration tab in the wunderbar, expand the Administration view and then click on the Unix/Linux Computers view.
From here, you can highlight/select all of the agents that you want to upgrade, then right-mouse click on them and choose the Upgrade Agent option to begin the process.
Upgrading the Web Console (stand-alone)
If you have a separate stand-alone Web console deployed (i.e. one that isn't on the same server as your management server) then you can follow this process to upgrade it. If your Web console is located on the same server as one of your management servers, then you will have already upgraded this role when following the Upgrade Management Server steps in Part 2 of this series.
Note:When you upgrade the web console, any customizations that were made to the web.config file after the web console was installed will be reset.
If you made changes after you set up your web console to either enable or disable Secure Sockets Layer (SSL), then the SSL settings will be reset during upgrade.
To resolve the issue, you must make changes to the registry key before you upgrade the web console, as follows: (always ensure to backup your registry before making changes and know that any incorrect modification here can cause havok with your system!)
- Logon on to the web console with an account that has local administrator rights, and on the desktop, click Start, and then click Run.
- Type regedit, and then click OK. The Registry Editor starts.
- Navigate to the HKey_Local_Machine\Software\Microsoft\System Center Operations Manager\12\Setup\WebConsole\ key.
- To enable SSL, set the following:
BINDING_CONFIGURATION=DefaultHttpsBinding
To disable SSL, set the following:
HTTP_GET_ENABLED=1
BINDING_CONFIGURATION=DefaultHttpBinding
To upgrade a stand-alone Web console, follow these steps:
- To begin the SP1 upgrade, logon to your SCOM 2012 Management Server with an administrative account and then browse to the location that you have mounted or extracted your SCOM 2012 SP1 RTM media to. Now right-mouse click on 'Setup' and choose the 'Run As Administrator' option
- From the Operations Manager Service Pack 1 splash screen, choose the Install option to begin.
- On the Getting Started, System Center 2012 - Operations Manager Upgrade page, review the features that will be upgraded, and then click Next.
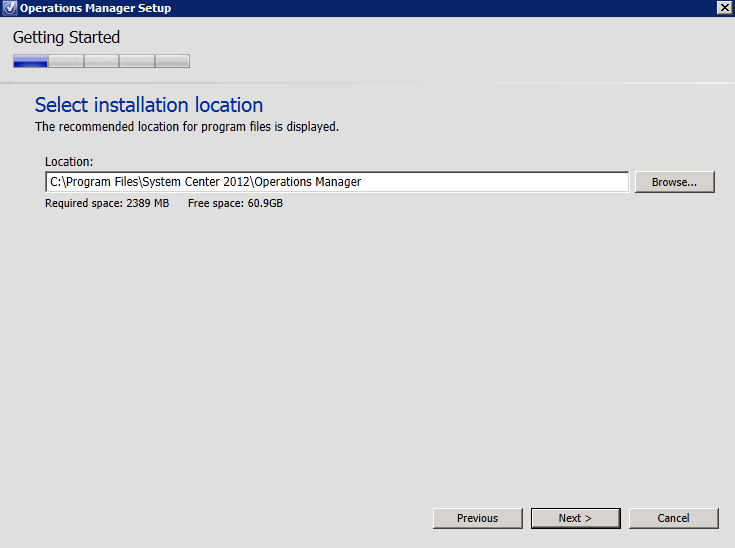
- On the Select installation location page, accept the default value of C:\Program Files\System Center Operations Manager 2012, or type in a new location or browse to one. Then click Next.
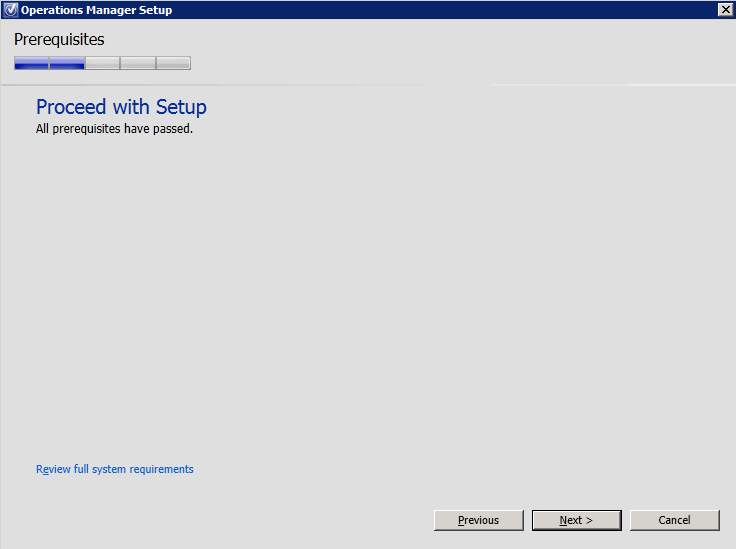
- On the Prerequisites page, review and address any warnings or errors that the Prerequisites checker returns, and then click Verify Prerequisites Again to recheck the system.
- If the Prerequisites checker does not return any warnings or errors, the Prerequisites, Proceed with Setup page appears. Click Next.
- When the Ready to Upgrade page appears, review the upgrade summary, and then click Upgrade.
If you have separated the Reporting role in your SCOM 2012 management group to exist on a server that is not a management server, then use this procedure to upgrade a stand-alone Reporting server to System Center 2012 Service Pack 1 (SP1), Operations Manager.
Note:You should not run the upgrade on the Reporting server until after you have upgraded the management servers, gateways, operation consoles, and agents
- To begin the SP1 upgrade, logon to your SCOM 2012 Reporting Role Server with an administrative account and then browse to the location that you have mounted or extracted your SCOM 2012 SP1 RTM media to. Now right-mouse click on 'Setup' and choose the 'Run As Administrator' option
- From the Operations Manager Service Pack 1 splash screen, choose the Install option to begin.
- On the Getting Started, System Center 2012 - Operations Manager Upgrade page, review the features that will be upgraded, and then click Next.
- On the Select installation location page, accept the default value of C:\Program Files\System Center Operations Manager 2012, or type in a new location or browse to one. Then click Next.
- On the Prerequisites page, review and address any warnings or errors that the Prerequisites checker returns, and then click Verify Prerequisites Again to recheck the system.
- If the Prerequisites checker does not return any warnings or errors, the Prerequisites, Proceed with Setup page appears. Click Next.
- When the Ready to Upgrade page appears, review the upgrade summary, and then click Upgrade.
- Click Close when the upgrade has completed successfully
Complete Post-Upgrade Tasks
When you have ran the SP1 upgrade installer on all of your SCOM 2012 components, all that you have left to do is to finalise a number of post-upgrade tasks to ensure that everything works as it should do. Carry out these tasks in the following order:
1. Re-enable the Notification Subscriptions
From the SCOM 2012 Operations console, click on the Administration tab in the wunderbar and then expand the Administration and then the Notifications view. Click on Subscriptions and then right-mouse click on any of your disabled subscriptions and choose the Enable option to re-enable them again.
2. Restart or Re-enable the Connector Services (if needed)
Refer to the third-party documentation for any installed connectors to determine if the connectors are supported for SCOM 2012 SP1
3. Verify That the Upgrade Was Successful
Perform the following tasks to verify that the upgrade was successful:
- Check the health state of the management servers and agents in the Health Service Watcher state view. In the Administration workspace of the Operations console, ensure that the management servers and agents are healthy. In the Monitoring workspace, check if there are any alerts related to the management group health.
- Review the event logs of all the management servers for new errors.
- Sort alerts by the last-modified column to review the new alerts.
- Check the CPU utilization and disk I/O on your database servers to ensure that they are functioning normally.
- If the Reporting feature is installed, click Reporting, and then run a generic performance report to ensure that Reporting is functioning correctly.
- Re-deploy any agents that you uninstalled during the upgrade process.
4. Carry out the SCOM 2012 Post-Upgrade Sequence Tasks
Follow the post-upgrade sequence steps in my recent blog post here to ensure that integration with other System Center 2012 products is maintained.
Conclusion
If you have worked through all of the steps relevant to your environment that are outlined in this series, then you should now have a fully functional and upgraded SCOM 2012 Service Pack 1 deployment.