Wednesday, October 12, 2011

Managing and Monitoring System Center DPM 2012 with SCOM Part 1

Building on my last two posts about upgrading DPM 2010 to DPM 2012, this series will explain how to configure the DPM 2012 Central Console utilising the SCOM 2007 R2 Console as the 'single-pane-of-glass' so to speak.

Some of the text in these posts I will have taken directly from the DPM 2012 BETA documentation but mostly it will be my own comments and findings as we move through each step in the process.

The Central Console is a new feature in System Center Data Protection Manager 2012. Using the Central Console, you can monitor and manage multiple DPM servers from one location.

Using Central Console, you can monitor and troubleshoot both DPM 2010 with KB2465832 and feature pack and DPM 2012.

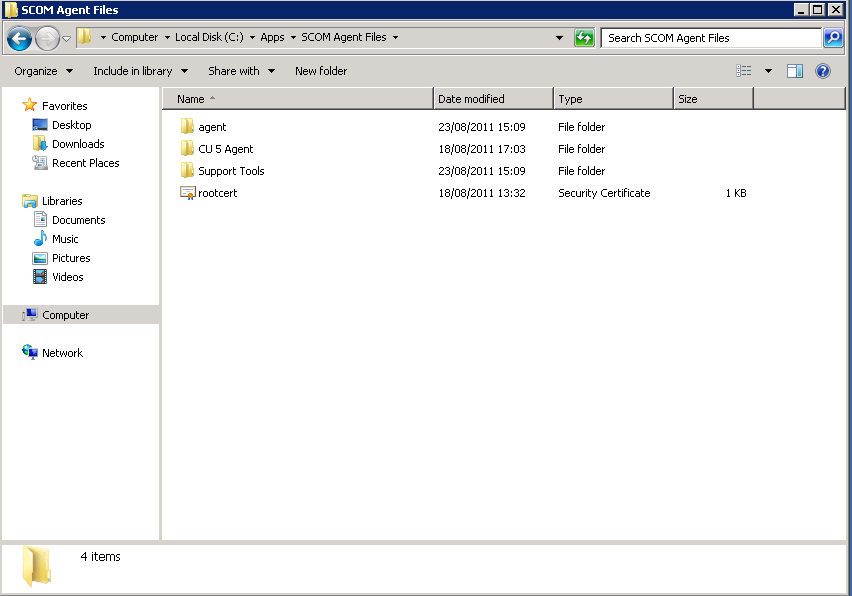
Note: Install the SCOM agent on all the DPM servers that you will be monitoring before going any further. Once the SCOM agent has been deployed using the standard SCOM agent deployment methods, then you can continue on with the DPM Central Console installation.

To begin the installation, firstly copy the DPM 2012 media to your SCOM Management Server (this can be the SCOM RMS or MS role but it must be a Management Server and not just a client with the SCOM console installed on it).

Once you have copied the media to the SCOM server, browse to the ‘setup.msi’ installer within the ‘DPM2012_BETA_FullBuild’ directory, right mouse click on it and then select ‘Run as Administrator’ to kick off the installation with administrative rights.


Once the DPM2012 splash screen opens up, click on the ‘DPM Central Console’ option to continue


This will open up the DPM Central Console installer and on the first page, accept the terms and conditions and then click on ‘OK’


There may be some pre-requisite software that the DPM 2012 installer will install at this point so just let it do its thing


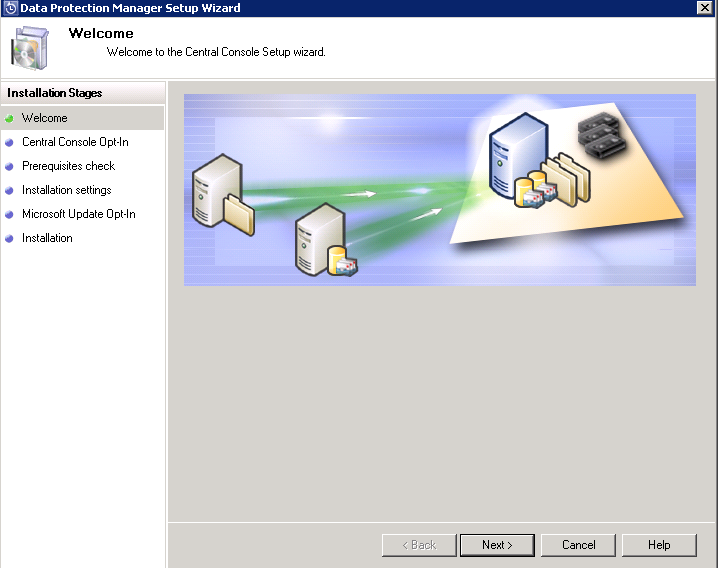
Once the pre-requisites are installed, you should see the ‘Data Protection Manager Setup Wizard’ and you need to click on ‘Next’ here to continue


On the ‘Central Console Opt-in’ screen, you will be presented with a number of options of which to install the Central Console

Taken from the DPM 2012 BETA documentation, these options are described as follows:

Server and Client Features
By installing both the server and client features, you will be able to monitor DPM servers on which the Operations Manager agent is present and use the scoped DPM Administrator console.
Note: If you have DPM protection agent installed on the computer, you cannot install Central console client features.

Note: Added firewall exceptions for port 6075 to enable scoped DPM Admin console. Open ports for SQL Server.exe and SQL browser.exe.

Prerequisites

System Center Operations Manager 2007 R2 Server components

Only Server Features

By installing only the server features, you will be able to monitor DPM servers on which the Operations Manager agent is present but you cannot use the scoped DPM Administrator console.
Note: Added firewall exceptions for port 6075 to enable scoped DPM Admin console. Open ports for SQL Server.exe and SQL browser.exe.

Prerequisites

System Center Operations Manager 2007 R2 Server components

Only Client Features

By installing only the client features, you can use the scoped DPM Administrator console but you cannot monitor DPM servers.

Note: If you have DPM protection agent installed on the computer, you cannot install Central console client features.

Prerequisites

System Center Operations Manager 2007 R2 Server components

Note: It is worth pointing out again that all of the above 3 options require the SCOM Server components installed and not just the SCOM console. This means you must install onto either a SCOM RMS (not recommended in my opinion) or a SCOM MS (recommended in my opinion).

As I have my SCOM agent installed on the DPM server for monitoring, but I don’t have the DPM agent on the SCOM server (this has been deployed to my parent Hyper-V host instead so the whole SCOM VM gets backed up and because of DPM 2012, I now have brick level recovery from a VHD file!), I am going to select the ‘Install Central Console Server and Client Side Components’ option and then click ‘Next’

The pre-requisite checker will begin and once complete, we should see the checks come back all good as below

 
Leave the next page at its default settings and then click ‘Next’ again


Select your Windows update option and click ‘Install’ to begin the process


Note that during the process it is installing the Central Console client components for DPM 2010 as well as DPM 2012


When all is completed, simply click on ‘Close’ to finish the installation of the Central Console

This completes Part 1 of this short blog series on 'Managing and Monitoring DPM 2012 with SCOM'.

In Part 2 of the series, I will explain how to import the new DPM 2012 Management Packs into SCOM and make the relevant changes to the registry to allow the new DPM 2012 Central Console to operate through your SCOM console.

Saturday, October 1, 2011

Upgrading System Center DPM 2010 to DPM 2012 Part 2

Update Edit March 2012: This post has been updated to reflect the release of the new DPM 2012 RTM build and supersedes the references to the BETA build that was originally written about.


In Part 1 of this series, I walked through the pre-requisites needed and installation process to upgrade an existing System Center Data Protection Manager (DPM) 2010 server to the System Center Data Protection Manager 2012.


In this post I will explain how to upgrade your DPM 2012 agents to the new DPM 2012 agent as well as demonstrate what is needed to get all of your upgraded DPM 2010 protection groups back into a healthy state after the upgrade has finished.

Double click on your new DPM 2012 shortcut and you will be presented with the new DPM 2012 Administrator Console like the window below. You can navigate around DPM 2012 by using the menu buttons on the left hand side of the screen


Upgrading the DPM 2010 Agents

To upgrade the DPM 2010 agents, we need to first click on the ‘Management’ tab from the Wunderbar on the left hand side and straight away, we should be presented with the ‘Agents’ screen showing which agents need to be upgraded to DPM 2012. If the 'Disks' or 'Libraries' screens open instead, simply click on the 'Agents' menu on the left to access the protected agents screen.


From this screen we can automatically update any agents that have been installed on machines that are based in the same Active Directory domain as the new DPM 2012 server. Just click on the ‘Update Available’ link to begin the agent update and click on ‘Yes’ from the resultant window
 

You should now see the upgrading progress with a percentage of how much is complete from the ‘Agent Status’ column


Once the update is complete, you should see a status of ‘OK’ in the ‘Agent Status’ column beside your servers. DPM 2012 is also clever enough to know that if you are upgrading an agent on a server that is a member of a Microsoft Failover Cluster, then it will automatically upgrade the agent on all members of the cluster at the same time!


If you have DPM 2010 agents installed on servers that are not members of an Active Directory that is trusted by the DPM 2012 server, you will need to manually upgrade these agents individually. When you click on the ‘Update Available’ link for these untrusted domain servers, you will see the following error


To upgrade these untrusted domain agents, we need to manually copy and then run the DPM 2012 agent installer files from the DPM 2012 server to each untrusted domain server that needs to be protected with DPM.

To do this, copy the DPM Remote Agent installation files from the following location

C:\Program Files\Microsoft DPM\DPM\ProtectionAgents\RA

to a location the untrusted domain server’s C:\ drive

Now, from the untrusted domain server, open an elevated permissions command prompt and browse to the location of the newly copied DPM 2012 agent files. Once you are in the relevant folder for your Server architecture – i.e. i386 for 32 Bit or amd64 for 64 Bit servers, run the ‘DPMAgentInstaller_x64.exe’ executable


Once it’s complete, you should see the following confirmation window


Now go back to the DPM 2012 Administrator Console, open the ‘Management’ tab from the left hand Wunderbar, click on the 'Agents' link to see all of your protected computers and then right mouse click on the untrusted domain server agent reference that you have just upgraded manually and click on the ‘Refresh’ option to refresh the view


You should now see an agent status of ‘OK’ beside your untrusted domain server agent – easy!


Repeat this process for all of your remaining agents that need to be upgraded before you continue onto the final overall upgrade steps of your DPM 2012 server.

Once all of your DPM 2010 agents – both trusted domain and untrusted domain – have been upgraded to DPM 2012 and show an agent status of ‘OK’, you can then go to the ‘Protection’ tab from within the DPM 2012 Administrator Console to view all of your existing Protection Groups


Make sure you have the ‘Protection Group’ view enabled from the ‘Group By’ section at the top of the window and then right mouse click on each protection group and select the ‘Perform Consistency Check’ option from the flash out menu as the screen below shows


This is a really neat feature in DPM  that allows us to now perform a consistency check on a whole protection group in one click!


Select ‘Yes’ to begin the consistency check on all members of the protection group

Repeat this process with all of your protection groups and once the consistency check is finished, you should have a healthy state showing on them all and you're ready to start using DPM 2012!

This completes the upgrade process of System Center DPM 2010 to DPM 2012.

If you want to learn more about DPM 2012 and its integration into SCOM, then have a read of my series of posts on:

Managing and Monitoring System Center DPM 2012 with SCOM

Friday, September 30, 2011

Upgrading System Center DPM 2010 to DPM 2012 Part 1

This is the first of many of System Center 2012 blog posts that I'm planning on writing over the next few months and I think it's only right that I start with one of the first System Center products that I began working with back a few years ago when it was System Center Data Protection Manager (DPM) 2007.

This backup offering from Microsoft has come a long way since those heady days of being simply a 'Microsoft backup product for Microsoft products'!

When I think back to the DPM 2007 application, I recall that, pre-Service Pack 1, it hadn't even got support for Hyper-V - although this was also in it's infancy in relation to where its at today!

A few years back, the company I worked for - CDSoft - who have now been acquired by the company I currently work for - Ergo Group Ireland - built up our System Center skillset and practice by implementing DPM 2007 SP1 along with the new Hyper-V virtualization application that came with Windows Server 2008 RTM. Although we found DPM 2007 SP1 to be an excellent brick-level backup product and a really good standalone Hyper-V host backup product, it was still lacking  when Windows Server 2008 R2 came along with Failover Cluster support and Cluster Shared Volumes (CSV's).

Late in 2009 we started hearing about DPM 2010 which had full support for Hyper-V R2 CSV's along with hardware based VSS snapshots and much better performance results. DPM 2010 is the most widespread and 'in-production ' version of Microsoft's backup offering and it's nearly a perfect fit for any Small to Medium Enterprise customers who have Hyper-V R2 installed in their environment - the type of customer that we see a lot of over here in Ireland!

With DPM 2012, Microsoft have really improved on it's performance and extensibility, along with now having a really tight knit integration with the other System Center products- most notably System Center Operations Manager (SCOM).

In the last couple of weeks I have found that it is possible to perform an in-place upgrade from DPM 2010 to DPM 2012 BETA to DPM 2012 RC to DPM 2012 RTM. Microsoft don't support the upgrade to RTM from the BETA or RC releases but will of course support the upgrade of DPM 2010 to DPM 2012 RTM.

As a result of this upgrade path, the following few blog posts will offer a guide to upgrading an existing System Center Data Protection Manager 2010 installation that has active trusted and untrusted domain agents deployed, along with protection groups that are fully populated from a production environment.

Edit Update May 2012: I've decided to update this post to reflect the upgrade process of DPM 2010 to the DPM 2012 RTM build as some of the references and screenshots to the BETA build - of which this series was originally written - are now defunct.

Upgrade Pre-Requisites
Before starting the actual upgrade, it’s always a good idea to take a backup of the DPMDB SQL database of your DPM 2010 server before beginning the DPM 2012 upgrade. In most instances, your DPM server is not going to be a virtual machine and as such, we have to revert back to the more traditional methods of ensuring we can recover if things don’t work out as planned with your upgrade!

You can back up the DPM 2010 SQL database quickly using the SQL Server Management Studio to logon to the SQL instance.


You can then right mouse click on your DPMDB database and choose the ‘Tasks’ and then ‘Back up’ flash out menus like the screenshot below

From the next screen, select a location for the backup of the database (or leave the default if you wish) and then select ‘OK


Once this is complete, you can close the SQL Server Management Studio window and proceed with the DPM 2012 upgrade

Below is some important information taken from the ‘System Center 2012 Data Protection manager Help’ document that you need to be aware of prior to starting the upgrade:

Important Information:

  • If you are upgrading an existing installation of DPM, the registry key for DS Collocation Factor is retained if it was modified by you and does not get reset.
  • Click Ignore on any pop-up dialog boxes that appear during upgrade.
  • If your Express Full backups for SQL Server databases are transferring large amounts of data (almost the size of the primary MDF file), you must install the update KB2471430 on the SQL Server. This typically happens after you have run DBCC CHECKDB on a Windows 2008 server.
  • Note that DPM 2012 will only run on Windows Server 2008 (R1) or higher
  • You MUST install the latest QFE rollup for DPM 2010 onto all of your DPM 2010 servers first and then once the update has been installed, you must push out the update to your protected servers that DPM 2010 is currently protecting.

You can download the latest QFE rollup for DPM 2010 from here:

http://support.microsoft.com/kb/2465832

Edit February 2012: There is an additional hotfix that you will now need to download and install as part of your upgrade to DPM 2012. This hotfix (KB 2615782) enables interoperability between DPM 2010 and the latest DPM 2012 build. You can download it from the following link:

http://support.microsoft.com/kb/2615782

When you have backed up your DPMDB database, installed the QFE rollup to your DPM 2010 servers and reviewed the important information above, you can download the DPM 2012 installer to continue

Download the DPM 2012 Evaluation from the link below, otherwise you can use the full build media that you are entitled to under licence from Microsoft:


Extract the contents of the DPM 2012 zip file to a location on the C drive of your DPM 2010 server.

This will give you two folders similar to the screenshot below


The ‘CC_x86_setup’ folder is the 32bit Central Console installer that enables you to install the new DPM console onto your x86 Windows 7 client machine if you wanted to

We will be using the ‘SCDPM' folder to carry out our upgrade

Double click on the ‘SCDPM' folder , right mouse click on the ‘setup.msi' installer file and select the ‘Run As Administrator’ option to run the installer with elevated rights


That will open the DPM 2012 splash screen as below. You can click on the ‘Run the Pre Requisite Checker’ option that will take you to a Technet article outlining all you need to know to confirm all your pre-requisites are in place for a smooth installation.

This blog post will assume that your original DPM 2012 installation is operating on a physical DPM 2010 server with the SQL role co-located on the same hardware using the default DPM 2010 SQL installation options. If you have your DPM 2010 installation on a remote SQL instance, or even want to move to a new remote SQL instance now, then this is a supported process with the upgrade and it is covered in more detail with the accompanying DPM 2012 documentation

Click on ‘Data Protection Manager’ to continue

 
Accept the licence and click on ‘OK’


From the ‘Data Protection Manager Setup Wizard’ window, click on ‘Next’


From the next window, leave the ‘Use the dedicated instance of SQL Server’ option enabled and click on the ‘Check and Install’ button to carry out a simple ‘pre-requisite’ check on your DPM SQL installation

Leave the defaults enabled from the next screen and click ‘Next’


At the next screen, input your licence key for System Center 2012 RTM and then click 'Next'


Type in the password for your DPM SQL service account and click ‘Next’ again


From the next screen, select the option to enable Microsoft Automatic Updates and then click ‘Next’ again

Select your option for the CEI Program and then click on the ‘Upgrade’ button (you should only see ‘Upgrade’ if you are performing an upgrade of DPM 2010 and all the pre-requisites have been met


Now let the upgrade wizard do its thing


If all goes according to plan, then you should see the screen below confirming successful upgrade of DPM 2010


Once you click on the ‘Close’ button, you will then be presented with the following window requesting that you reboot your DPM server to complete the installation


Click ‘OK’ and then reboot the server


When your server has rebooted, you will notice that your DPM 2010 desktop shortcut has changed to a nice new DPM 2012 one!!


In Part 2 of this short series, I will demonstrate what needs to be carried out to get your protected server agents - both trusted domain based and non-trusted domain based upgraded to the DPM 2012 agent files. I will also explain what needs to be done to ensure your existing protection groups are synchronized and fully up to date without having to modify or recreate them.

Friday, September 23, 2011

Got Windows Server 2008 or Windows 7 Client and want to play God?

I came across this information a long time back but never got a chance to implement it until last night. It's a quick hit way to gain 'God' like access to all of the administrative tasks that are available on your Windows Server 2008 or Windows 7 O/S.

All you need to do is to firstly create a new folder on your Windows 2008 or Windows 7 desktop by right mouse clicking on a blank space and then selecting the 'New' and then 'Folder' flash out menu options.

Once you have the new folder on your desktop it should look like any normal newly created folder icon similar to below

 Once you have this new folder created, right mouse click on it and select the 'Rename' option.

Now copy the text from the line below and rename your newly created folder with the exact text.

GodMode.{ED7BA470-8E54-465E-825C-99712043E01C}

Once you rename your new folder to the above text, the icon on the folder should change to a new icon denoting you have created a 'GodMode' access icon similar to the screenshot below


Now when you double click on the 'GodMode' icon, you will see a huge list of links that allow you to do all sorts of administrative tasks!


 Now, I wonder if the same cheat would work for a Windows 8 O/S?

Wednesday, September 14, 2011

Bye, Bye CSV's, SAN's and Manufacturer NIC Teaming, Hello Windows Server 8!!

Well, it's day 2 of the Build Windows conference in Anaheim, Calafornia and already the revelations about Microsoft's new operating systems - both Windows 8 client and Windows Server 8 - are coming fast and furious!

The attendees who were lucky enough to be present there yesterday (unfortunately I'm not one of them) for the keynote speech by Microsoft's Steven Sinofsky were shown demonstrations of the power and efficiency of all the new features that the Windows 8 client comes with out of the box. Microsoft call it the 're-imagining of Windows'!

These new Windows 8 client features include some of the following:

  • New touch screen GUI
  • New apps for developers to work on called 'Metro Style'
  • Massive performance gains - includes full cold boot up in less than 8 seconds!
  • Spell checking throughout the whole Windows 8 experience
  • Built in XBox Live
  • Enhanced search features - 'a la' iPad
  • Built in Hyper-V

To top yesterday's keynote speech and demonstrations off, all of the attendees got themselves a shiny new Samsung slate that comes with the Windows 8 client developer preview installed and ready to use!!

You can view the Keynote speech for yesterday on the Build Windows website using the URL below:

http://channel9.msdn.com/events/BUILD/BUILD2011/KEY-0001

In today's keynote speech they got down and dirty with Windows Server 8 which is going to be very relevant to my line of work and I really wanted to get a look at the new features released.

The main Keynote speaker for day 2 is Microsoft's Satya Nadella and he is assisted throughout the speech by a number of other speakers including Jason Zander (Metro UI), Bryon Surace (Windows Server 8) and even a surprise apperance from Microsoft CEO Steve Ballmer!

My primary interest from todays keynote speech was the Windows Server 8 demo's and I have to say, I wasn't disappointed from what I saw.

Here's a summary of some of the key new features in Windows Server 8:

  • NIC teaming natively - now this is a feature that I like the sound of, no more 'unsupported' configs
  • No longer are CSV's/SAN's a pre-requisite for Hyper-V clusters  - made possible with SMB 2.2
  • Support for 32 virtual processors
  • Hyper-V replica - this will replicate Virtual Machines 'on the fly' without any downtime
  • Live migration of VHD's to a different storage location
  • Extended VHD size using the new VHDX file format to bring the size over 2040GB

OK, so the above new features don't mean the death of CSV's or SAN's but it was a nice tagline!! The new SMB 2.2 protocol allows VHD's to be mounted and run in Hyper-V from a simple file share UNC path, thus negating the pre-requisite for a Hyper-V cluster of needing shared storage. You can now 'Live Migrate' between two stand alone Hyper-V servers using file shares!

It is worth noting though that without Shared Storage/Failover Clustering, you wouldn't have High Availability, which is one of the main benefits of clustering!!

It is also worth noting now however, that your storage clustering Kung Fu doesn't need to be that strong any more to avail of the power of Hyper-V Live Migration - although any Hyper-V engineer would do well to know your iSCSI from your Fibre Channels and your MPIO's from your reservations!

With Windows Server 8, we should see an end to my pet hate of manufacturer NIC teaming and the many disagreements I have with my workmates over Microsoft's cagey support of NIC teaming in a Hyper-V environment - particulary on the storage side of things!

If you want to view todays Keynote speech, then click on the link below:

http://www.buildwindows.com/

If you would like to download a copy of the Windows 8 client developer preview, then you can do so from the following URL:

http://msdn.microsoft.com/en-us/windows/apps/br229516

Finally, I've only touched the surface of what's been happening over in Build this week and if you want to get a blow by blow account of everything that's happening, then check out Aidan Finn or Hans Vredevoort's blogs as I've found them to be an excellent source of up to date info on what's coming out of the conference.

Thursday, September 8, 2011

Windows 8 officially confirmed with built-in Hyper-V!

In anticipation of next weeks 'Build Windows 2011' conference, Microsoft have confirmed the rumours that the new Windows 8 client operating system will come with Hyper-V built-in as standard.

Those of you familiar with Windows Server 2008 Hyper-V will see a very familiar interface on the Windows 8 client when compared to the server based implementation. The challenge that MS had to overcome with building Hyper-V into a client O/S was that a lot of client O/S devices that will use Hyper-V would have Wireless NIC's. Microsoft have confirmed support for Wireless NIC's in Windows 8 and have provided an example video of it working.

They have also demonstrated the new boot up speed which I calculated at close to 6 seconds from POST to Start screen!!

See the links below for more information:

http://blogs.msdn.com/b/b8/archive/2011/09/07/bringing-hyper-v-to-windows-8.aspx

http://blogs.msdn.com/b/b8/archive/2011/09/08/delivering-fast-boot-times-in-windows-8.aspx

SCDPM 2010 - Force System Provider VSS Backups of Hyper-V CSV Volumes

I came across an issue today where I wanted to use DPM 2010 to backup a number of virtual machines that were running on a non-clustered Hyper-V host but which had the HP P4000 Left Hand Hardware VSS Writer installed on it.

When I added the Virtual Machines to my protection group and ran a Hyper-V backup of those VM's, this is the error that came back to me after a few minutes

Affected area: \Backup Using Child Partition Snapshot\ -VMM2012

Occurred since: 08/09/2011 11:33:07

Description: The replica of Microsoft Hyper-V \Backup Using Child Partition Snapshot\-VMM2012 on VMHOST1-SRV. is inconsistent with the protected data source. All protection activities for data source will fail until the replica is synchronized with consistency check. You can recover data from existing recovery points, but new recovery points cannot be created until the replica is consistent.

For SharePoint farm, recovery points will continue getting created with the databases that are consistent. To backup inconsistent databases, run a consistency check on the farm. (ID 3106)

Failure occurred while adding one or more of the volumes involved in backup operation to snapshot set. Please check the event log on VMHOST1-SRV. to troubleshoot the issue. (ID 30290 Details: Internal error code: 0x80990A00)

Check recent records from the VolSnap source in the Application Event Log to find out why the problem occurred.
Synchronize with consistency check.

Resolution: To dismiss the alert, click below

Inactivate alert


Now at this point, I remember reading back when DPM 2010 was released that it would always default to try and use a hardware VSS writer if it was present on the Hyper-V host first instead of using the built in System VSS writer.

This is by design and a pretty good design too in fairness as it is the best way to backup the VM's your CSV's in your Hyper-V cluster.

I didn't want to have to go through the hassle of troubleshooting why the HP P4000 Left Hand hardware VSS writer wasn't working and I didn't want to uninstall it as we were using other volumes on that server that would need it.

All I wanted was a quick way to backup the VM's using the built in System VSS writer in Windows Server and I decided to write up a quick blog post on it - as much for my own reference as anyone elses!

Logon to the Hyper-V host (or hosts) that you are trying to backup using the System VSS Writer with an administrative account.

Open up the server registry using 'Regedit'

Browse to the following location in the registry:

HKLM\Software\Microsoft\Microsoft Data Protection Manager\Agent

Now when you get to this point, right mouse click on the 'Agent' key folder and then select 'New' and then highlight 'Key' and click 'Enter' (see the screenshot below)


This will now create a new subkey underneath the 'Agent' key

Rename this subkey to:

UseSystemSoftwareProvider

You should now have a registry key structure like the screen below on your Hyper-V host


Once you have completed these simple steps, re-run or synchronize the DPM protection group that contains the virtual machines on the Hyper-V host you have just modified and it will complete successfully this time!!

Make sure that if you want to use the System VSS writer on all of your Hyper-V hosts that you add the above registry key to each one. It is also worth noting that if you are not using a Hardware VSS Writer, then you will need to configure serialization of your Hyper-V backups, otherwise the virtual machine backups within each protection group will fail randomly due to lack of access to the Cluster Shared Volume.

Here's a great link on how to configure CSV serialization:

http://technet.microsoft.com/en-us/library/ff634192.aspx

One final point to note is that this process is irrelevant if the Hyper-V host has no Hardware VSS writers installed in the first place as DPM 2010 will then just try to use the System VSS writer instead.

Thursday, September 1, 2011

Using Internal Certificates with SCOM on Windows Server 2008 Part 4

This is the final post in this 4 part series about 'Using Internal Certificates with SCOM on Windows Server 2008'. I recommend to read through the other 3 parts to this series first to ensure you have met all of the requirements needed to continue with the instructions contained in Part 4.

Here are the links to the other posts in this series:

Using Internal Certificates with SCOM on Windows Server 2008 Part 1

Using Internal Certificates with SCOM on Windows Server 2008 Part 2

Using Internal Certificates with SCOM on Windows Server 2008 Part 3

In this post I will detail how to manually install the SCOM agent, update it to the latest Cumulative Update 5 (CU5), and then how to import the certificate into SCOM for PKI authentication of your untrusted domain / DMZ or SCOM Gateway server.

Manually installing the SCOM agent onto an Untrusted Domain / DMZ server

Firstly, you need to ensure that you can ping by using FQDN, the SCOM Management Server from the untrusted domain /DMZ or SCOM Gateway server and then also you must be able to ping the untrusted domain / DMZ or SCOM Gateway server from the SCOM Management Server too. You may need to use static host entries on the local computers to achieve this but it is imperative that this step is complete before moving onto the next steps.

You will also need to ensure that traffic is allowed over the relevant ports as per Microsoft Documentation (particularly TCP port 5723) - see link:

http://technet.microsoft.com/en-us/library/bb309428.aspx

Once communication between the SCOM Management Servers and the untrusted domain / DMZ or SCOM Gateway server has been established, on the SCOM Management Server, go to the ‘Administration’ tab and then select ‘Settings’ on the left hand side of the screen. From here, double click on the ‘Security’ option in the middle of the screen to open the ‘Global Management Server Settings – Security’ window as below


From the ‘Global Management Server Settings – Security’ window that opens, you need to select ‘Review new manual agent installations in pending management’ and then also decide whether or not you want SCOM to ‘Automatically approve new manually installed agents’

If you leave the ‘Automatically approve new manually installed agents’ tick box unchecked, then you will need to go to the ‘Pending Management’ queue after an agent is manually installed and allow it to be monitored within your SCOM environment

Once you have decided on your manual agent installation policy, log on to the computer in the untrusted domain / DMZ that you want SCOM to monitor with an account that is a member of the ‘Local Administrators’ group.
The SCOM agent needs to be manually installed on the server/computer that you wish to monitor before you can import the certificate into SCOM. To install the SCOM agent, create a folder on the C drive of the server to be monitored called something like ‘SCOM Agent Files’ and ensure you have copied the SCOM Agent installation folder from the original SCOM installation media here.

You will also need to copy the SCOM Agent update folder from the latest Cumulative Update version 5 (CU5) download to the server as the original SCOM agent installation will need to be upgraded to CU5 before you bring it into SCOM. Finally, you will need to copy the ‘Support Files’ folder from the original SCOM media to the ‘SCOM Agent Files’ folder that you created from the previous paragraph as this folder contains the ‘MOMCertImport.exe’ utility that is needed to import the certificate once the agent has been manually installed and updated to CU5.

See the screen below for an example of the folders needed to be copied:


Once the folders above have been copied to the local C:\ drive of the untrusted domain / DMZ server that you want to bring into SCOM, then open up a command prompt with Administrative privileges to continue.

Using the command line, browse to the AMD64 folder within the original SCOM installation ‘Agent’ folder (or the i386 folder if you are installing onto a 32Bit O/S) and run the ‘MOMAgent.msi’ installer to begin the installation.


Click ‘Next’ from the screen below to start the Agent installation wizard

 
Leave the default install location as it is and click ‘Next’

 
Ensure ‘Specify Management Group Information’ is selected, then click ‘Next’


Fill out the fields in the following screen with information relevant to your SCOM installation

 
Leave ‘Local System’ selected and then click ‘Next’

 
Click on the ‘Install’ button from the final screen to install the SCOM agent from the original installation media.

When the agent installation is completed, you should see the screen below

 
Once the original SCOM media agent installation is complete, open up a command prompt again with Administrative privileges and browse to the location that contains the CU5 Agent installation files

 
Run the ‘KB2495674-x64-Agent.msp’ file to begin the upgrade of the agent to CU5

Once complete, you should see the following window again


That completes the installation of the SCOM agent and also the upgrade of the orginal SCOM agent to CU5. All that's left to do now is to import the certificate into SCOM that was issued by the internal Certificate Authority to the untrusted domain / DMZ or SCOM Gateway server using the 'MOMCertImport.exe' utility.

Importing certificates using the 'MOMCertImport.exe' utility


If you have been following this blog series through to this point, you should now have the following implemented on your untrusted domain, DMZ or SCOM Gateway server:
  • CA Root certificate imported into ‘Trusted Root Certification Authorities’
  • Certificate requested from CA using SCOM Certificate Template
  • Requested certificate imported into the ‘Certificates – Local Computer’ store
  • SCOM agent manually installed and updated to CU5
If all of the above are true, then you can now open up the ‘Certificates – Local Computer’ store by following the instructions below:

On the Windows desktop, click Start, and then click Run.

In the Run dialog box, type mmc, and then click OK.

In the Console1 window, click File, and then click Add/Remove Snap-in.

In the Add/Remove Snap-in dialog box, click Add.

In the Add Standalone Snap-in dialog box, click Certificates, and then click Add.

In the Certificates snap-in dialog box, select Computer account, and then click Next.

In the Select Computer dialog box, ensure that Local computer: (the computer this console is running on) is selected, and then click Finish.

In the Add Standalone Snap-in dialog box, click Close.

In the Add/Remove Snap-in dialog box, click OK.

Expand the ‘Personal’ folder and then expand the ‘Certificates’ sub-folder under here to see the certificate that we requested and imported previously as below


Now open up a command prompt with Administrative privileges and browse to the location that you have copied the ‘Support Tools’ folder from the original SCOM media.

Browse to the ‘MomCertImport.exe’ utility in either the AMD64 or i386 subfolders  (depending on whether or not you are installing to an x64 or x32 bit machine) of the ‘Support Tools’ folder as below


Now add the /subjectname switch to the end of the ‘MOMCertImport.exe’ utility and specify the full subjectname of your imported certificate exactly as it displayed back in the ‘Certificates – Local Computer\Personal\Certificates’ store


If all is successful, then you should get the following message back


This should be all you need to do to get the untrusted / DMZ or SCOM Gateway server communicating with your SCOM Management Server using internal certificates. If there is any issues with the agent not becoming active within the ‘SCOM Agents’ window, make sure you don’t have the ‘Reject New Manual Agent Installations’ option selected from within the SCOM ‘Administration tab (this has been described further back in this blog series).

If you have allowed manual installation of the SCOM agents through the security settings and have followed everything in these posts correctly but the agent still doesn’t become active in SCOM, then it would be worth restarting the Health Service on firstly the untrusted domain /DMZ server and then secondly on the SCOM Management Server. This can sometimes be a final step needed to start the monitoring of your untrusted servers.