This post is part of a series that coincide with the new Microsoft Private Cloud Community Evaluation Program starting up and you can sign up at any time to the CEP by clicking on the link below (you will need a Microsoft Live ID to sign in):
https://connect.microsoft.com/site799/program7383
Once you have created your private cloud within SCVMM 2012, you then need to populate your VMM 2012 library with Virtual Machine templates. This process has been simplified from the old SCVMM 2008 R2 template creation but for the most part, the steps are the same.
I recommend building your baseline Virtual Machines on a Hyper-V host that is managed by SCVMM 2012 and then once configured, you will need to shut down the baseline virtual machine in preparation for importing it into the VMM 2012 library.
To begin with, open up the SCVMM 2012 console and click on the 'Library' button from the wunderbar on the left hand side of the screen. Now expand the 'Templates' icon to see three options. One of these options is 'VM Templates' and you need to right mouse click on this and then select 'Create VM Template' from the menu that opens to start the process.
This will open the 'Create VM Template Wizard' and you will need to select from one of two options that are available in this window. For this example, I am going to choose 'From an existing virtual machine that is deployed on a host'. Click 'Next' once you have made your selection.
SCVMM 2012 will now query all of the hosts that it is managing and come back with a list of virtual machines that are powered down. It's worth noting at this stage that if you have prepared a virtual machine to be used as a template but haven't turned the machine off, then it will not be available in this window for selection until you shut it down.
Select the virtual machine that you wish to use from the list above and then click on 'OK' to continue
The window above is a warning telling you that the source virtual machine you have selected will be destroyed and will advise you to clone the machine if you want to keep a copy of it in it's current state.
In this case, we are happy that the machine is to be used only as a VM template, so we will click 'Yes' to continue
The 'Create VM Template Wizard' returns in this screen and you now need to give the template a name and then click 'Next' to continue
From the screen above, choose your hardware profile and then click 'Next' again
From the next screen, you can make changes to the Operating System profile such as admin password, computer name, locale etc. Click 'Next' to continue
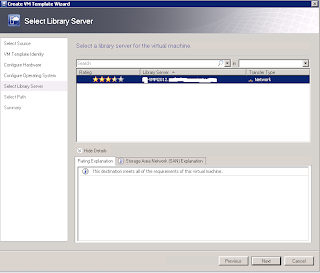
From the 'Select Library Server' screen, choose the SCVMM server that you wish to store this virtual machine template and then click 'Next'
Now select the library path on the SCVMM library server that you want to store the virtual machine template and click 'Next' again
When you click on the ‘Create’ button, SCVMM 2012 will move the baseline virtual machine that you have created from the Hyper-V host that it is sitting on into the SCVMM 2012 library share that you specified. Once it has been moved to the library share, it will sysprep the machine for provisioning use within your environment.
Once you have your VM templates imported into SCVMM 2012, you should see them available within your library under the ‘Templates’, ‘VM Templates’ section as below
This completes your virtual machine template creation and you are now ready to use these templates to form part of your Service Application templates within SCVMM and your cloud environments.
If you want to learn more about Cloud Management with System Center, click the link below for my next post:


Nice explaination with all the information about what happens in the background!
ReplyDeleteThanks!
ReplyDeleteKevin